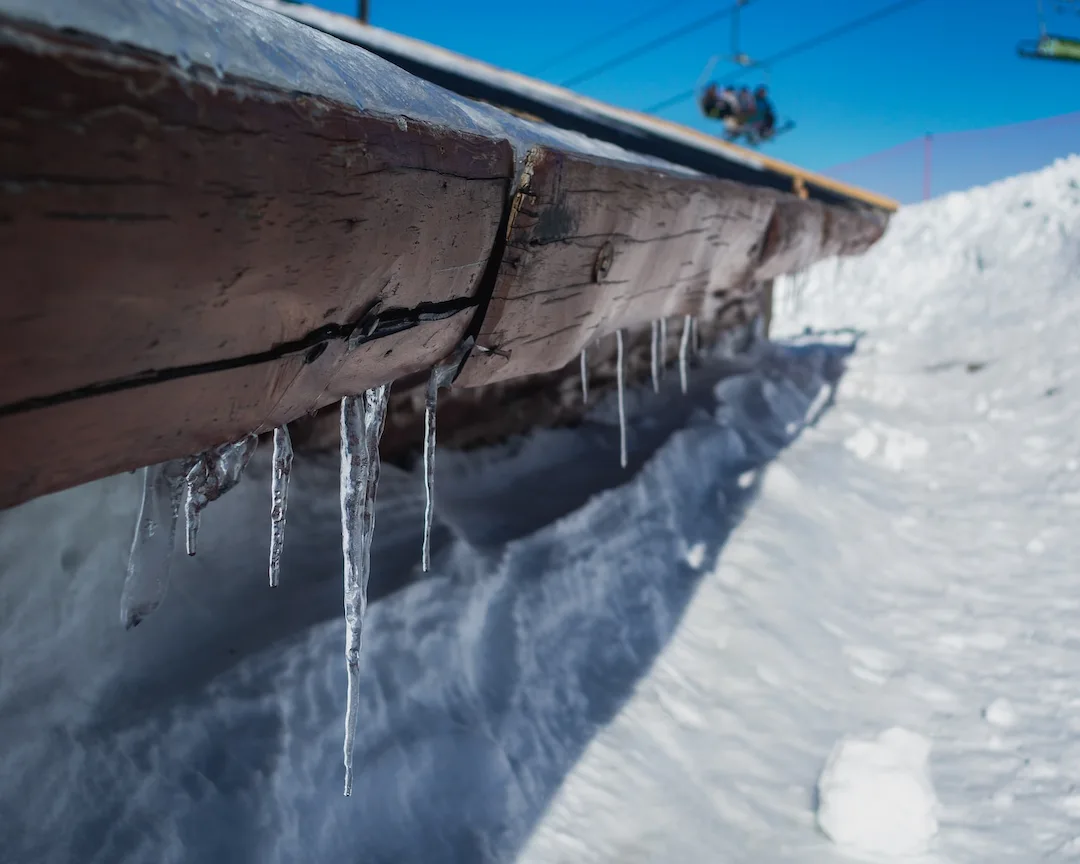
When winter’s icy grip takes hold, homes are often subject to a myriad of challenges. Among these challenges, ice dams stand out as not only visually striking but potentially damaging. If you’ve ever spotted large icicles hanging from your gutters or the edges of your roof, you’ve encountered an ice dam.
We are here to provide you with a comprehensive guide to understanding, repairing, and removing ice dams, ensuring your home remains safe and undamaged.
Understanding the Formation of Ice Dams
Before diving into repair and removal, it’s crucial to understand the genesis of an ice dam. It begins with a snow-covered roof. When the heat from inside your home escapes through the roof, it melts the snow layer closest to the roof’s surface. This melted snow then trickles down the roof slope until it reaches the colder eaves and refreezes, forming the ice dam.
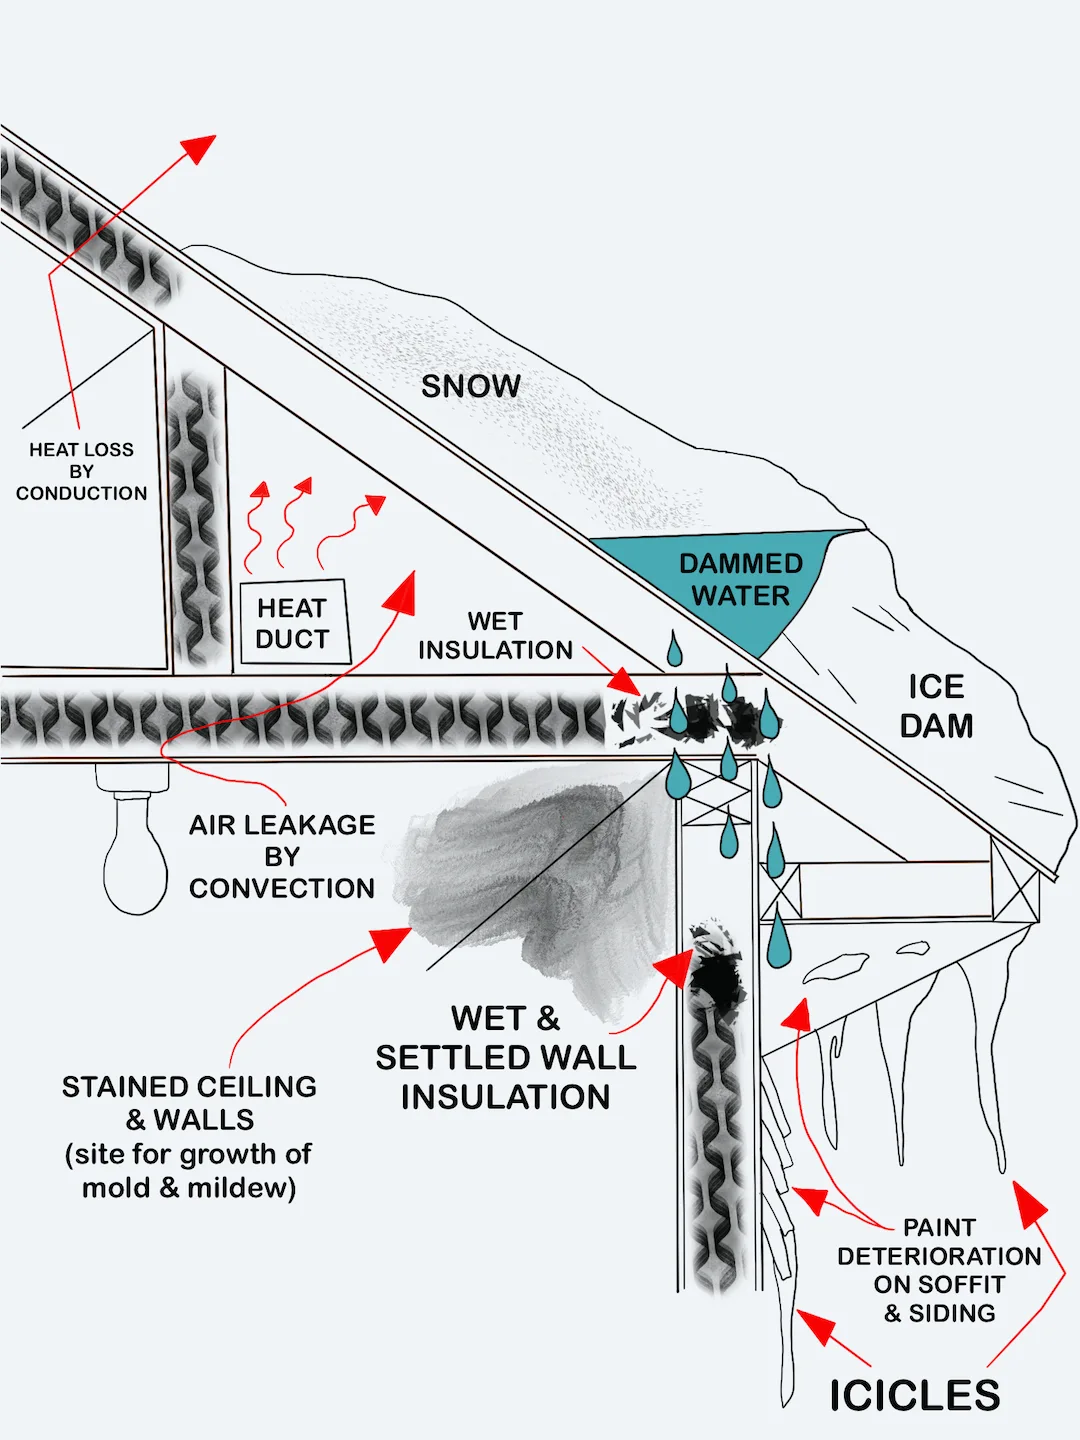
This illustration above depicts the formation and consequences of an ice dam on a roof. An ice dam is a ridge of ice that forms at the edge of a roof and prevents melting snow from draining off. Here’s a breakdown of what the image illustrates:
- Snow: Snow accumulates on the roof.
- Heat Duct: This represents a source of heat within the house. It releases warm air that can cause the snow on the roof to melt.
- Heat Loss by Conduction: As heat from the interior of the house escapes, it causes the bottom layer of the snow to melt.
- Air Leakage by Convection: Warm air can escape from the house and cause additional melting of the snow.
- Wet Insulation: When the heat escapes, it can cause the insulation to become wet.
- Dammed Water: As the melted snow runs down the slope of the roof, it can refreeze when it reaches the colder eaves, leading to a buildup of ice.
- Ice Dam: This is the actual ridge of ice that forms at the edge of the roof. It blocks the melting snow from draining off the roof.
- Icicles: These are formed as the water drips off the edge of the ice dam and freezes.
- Paint Deterioration on Soffit & Siding: The trapped water can cause paint to deteriorate on the soffit and siding.
- Stained Ceiling & Walls: Water that backs up behind the dam can leak into the house and lead to stains on the ceiling and walls. This can also be a site for the growth of mold and mildew.
- Wet & Settled Wall Insulation: The insulation in the walls can become wet and settle due to water leakage.
Ice dams can lead to structural damage and are a sign of inadequate insulation and ventilation in the attic space. It’s essential to address the root causes to prevent future ice dams and the associated damage.
Signs You Have an Ice Dam
Recognizing an ice dam early can save you a lot of headaches and expenses in the future. Some common indications include:
- Large icicles: Hanging from the edge of the roof or gutters.
- Frozen gutters: Gutters filled with ice can be a precursor to larger ice dam formations.
- Stained Ceiling & Walls: Water that backs up behind the dam can leak into the house and lead to stains on the ceiling and walls. This can also be a site for the growth of mold and mildew.
If you notice any such signs, it is crucial to address them immediately to prevent further damage and potential mold growth.
Prevention: The First Line of Defense
The best way to deal with ice dams is to prevent them from forming in the first place. We suggest the following proactive measures:
- Proper insulation: Ensure that your attic and roof are well-insulated to minimize the amount of heat escaping.
- Ventilation: Adequate ventilation helps in keeping the entire roof at a consistent temperature, reducing the chances of snow melting and refreezing.
- Roof raking: After heavy snowfalls, use a roof rake to clear the snow off your roof, especially near the edges.
Ice Dam Repair: Addressing the Damage
If you’ve detected an ice dam, it’s vital to address the potential damages promptly.
- Inspect for leaks: Check the attic and interior walls for signs of moisture or water damage.
- Roof repair: Should you spot any compromised shingles or leaks, it’s paramount to have them repaired immediately to prevent further damage.
- Gutter inspection: Ensure that the gutters are not damaged or detached due to the weight of the ice.
Effective Ice Dam Removal Techniques
When it comes to ice dam removal, it’s essential to approach the task with safety and efficiency in mind. Here are the methods we recommend:
- Steam removal: This method involves using industrial steamers to melt away the ice dam without causing damage to the shingles.
- Calcium chloride: Filling a nylon stocking with calcium chloride and placing it atop the ice dam can help in melting it. Ensure the stocking is perpendicular to the edge of the roof for best results.
- Professional removal: Given the risks involved, sometimes it’s best to hire professionals experienced in ice dam removal. They’ll have the tools and expertise to address the issue without causing further damage.
The Importance of Timely Action
Ice dams can lead to significant structural damage if left unchecked. By understanding their formation, spotting early signs, and taking preventative measures, you can protect your home and wallet. However, should you face an ice dam, it’s critical to address it promptly, either by utilizing effective removal techniques or seeking professional help.
In conclusion, while ice dams might seem like just another winter annoyance, they have the potential to wreak havoc on your home. With the right knowledge and tools, though, you can ensure that your house remains ice dam-free and in top shape throughout the coldest months.